   |
|
|
|
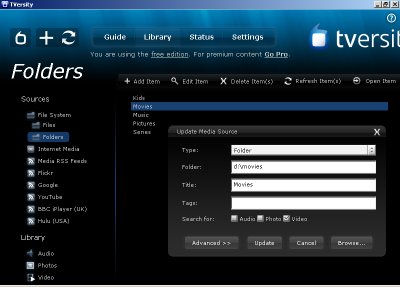
Windows 7 WMP11 and 12 offer a DLNA server mode as well. I couldn't get it to work reliably, so I gave up on it. You might have more luck. To remove WMP afterwards can be troublesome, consider making a backup first. Ah. TVersity. It was free, but is no longer. It's a good DLNA server / transcoder with a decent HTML interface (which got a little worse with the demise of Flash), but it has some seeking issues. TVersity is a software package that delivers media to different kinds of clients. TVersity should be / is able to convert media on the fly. If you're using a HTPC with something like XBMC or a media player that can handle any and all formats then you do not need TVersity unless you want to use any of the 'web streaming' functions. Update: Tversity 2.x improved searching behaviour. It still isn't perfect, but what is. My solution: install both TVersity and Servio, or TVersity and UMS. You might want to get a little older version of TVersity (1.9.7) if you want to go free, as the latest version of TVersity now requires payment. Not too much, but still. TVersity
can be accessed in two ways: either by specifying the exact IP address
+ port of the TVersity server, or by searching for DLNA
/
UPNP devices, in which case things
might
or might not work. Sorry about that.
UMS versus TVersity The most likely alternative to TVersity is UMS, which has some advantages and disadvantages. UMS
What does it do? Any DLNA client can get data from a DLNA server, in a 'stream'. Ie. the server sends video data to the client. If the client can handle that data is up to the client. If your client can browse a file server, then you won't need TVersity or Serviio. video file -> TVersity -> DLNA -> clientIf your client cannot handle the file, you have two options: convert the file before playing it, or convert it 'on the fly'. Which is what TVersity and Serviio can do for you. video file -> TVersity transcode -> DLNA -> clientFor example, many DLNA clients (think: older televisions with a network connection, and 'better' brands of media players) have problems with some .WMV or .MKV files, they can't handle very high resolutions, newer H264 coded files, etcetera. Installation Notes:
You might also want to install a codec pack before AND after installing TVersity to avoid some weird problems. (I know I had to on several occaisions.).
If you have your harddrive well organised, you might want to set Settings / Media Library / Media Library Menus to 'File System'. 1.9.3 1.9.3 was the highest version that I could get to work on VirtualBox. For some strange reason anything higher than 1.9.3 wouldn't work on VirtualBox, but would work on a regular machine. I have tried everything but could not isolate the problem. This for those people like me that like to experiment first in VirtualBox before doing 'the real thing'. Typically I leave my VM's at 512 MB 'real' memory and 512 'virtual' memory (with a host with just 4 GB there are some limits to be observed). For my experimental VM media server (running SqueezeBox server, Calibre server, and TinyWeb) 512 wasn't enough, so I upped it to 768 'real' / 1024 'virtual'. 1.9.7 1.9.7 gave me some problems when doing an upgrade directly over 1.7.2.1, but a deinstall / reinstall fixed the problem. The problem didn't appear when installing over 1.9.x versions. 2.1 2.1 is no longer free but now costs $3.99. At first glance there's little new. You still cannot define the location of temporary files, for iPad integration you need to buy the even more expensive Pro version, and it still won't handle all .MKV files. It does have improved searching through streams, that is true, and perhaps transcoding is just a little smoother than before. But, TVersity people, get serious. Paying 20 bucks for an app that does a bit more iPad transcoding stuff, whilst a program like ServeToMe costs way and way less? No GUI for creating / maintaining profiles? Can't even set a path for temporary files? I hate to say it, but that doesn't bode well for the future. I will not spend any more money on TVersity, unless there is serious improvement. You've had me as a customer once, but I fear there is little chance for recurring business at this price / performance level... Still, for most users the old version will work fine. So, if you're cheap, check out Serviio or use an older version of TVersity. 2.4 Well, Serviio is now no longer free. And though my old key should be outdated, it still seems to work with newer versions of TVersity. 3.0 / 3.1 A new version of TVersity, and the business model has changed again. The 'basic' version disappeared, so it's either 'free' or 'pro'. The free version isn't of that much use as it no longer transcodes... The Pro version still does. Though I wasn't planning to upgrade I actually did (I was bored). At first glance I cannot find anything seriously different, except perhaps the ability to stream to an iPad. Which frankly doesn't work well. Hmm. A pity. If you want to experiment with transcoding you'll either have to find an older version or pay. Note: to install TVersity in another folder set compatibility mode to 'XP SP3' and 'Run as Administrator'. 3.5 On the server side there is now a kind of configuration program, I just wonder what are the main differences. There's also Xbox One support (media playback is something Sony with its PS3 and PS4 should seriously work on). The bad news is the admin side of the web interface no longer seems to work... It seems to be a known bug, according to the TVersity forums. The following seems to work: http://192.168.0.5:41952/admin/old.html3.5 is also supposed to work with iPads. My copy wouldn't. 3.6 Quickly following 3.5 there's 3.6. This one worked with my iPad. Some improvements, still some bugs. http://192.168.0.5:41952 - without flash Accessing network drives You don't have to do this if the files you want to transcode / stream are on the same machine TVersity is installed on. This part is only required if TVersity runs on one machine, and needs to access files on another machine (or NAS). When running TVersity as a service, accessing another shared or mapped drive (ie. client -> TVersity machine -> other server) can be a bit of a hassle. I got it to work doing the following:
Note! Use a proper password for the TVersity account! It's a real account with administrative rights, so if username and password are too easy, anybody could try to log in onto the MediaServer (the machine on which TVersity was installed) and subsequently have full rights on your machine. Not a good idea... Obviously
there's no issue if you have all media files and TVersity on that
same machine.
Strange filenames Sometimes
a .WMV file may not show up under its filename (I don't know if
this would happen to other files as well)... If this is the case then check
the 'properties' of that file. On one of my .WMV files there was under
'Properties / Summary / Simple' a name in the 'Title' field. Removing that
name fixed the problem.
Temporary files Unfortunately, you cannot configure a temporary folder for TVersity. If you do NOT want TVersity to store temporary files under Program Files\TVersity\... (for example because you have a (small) SSD bootdrive or something similar) then you'll have to install TVersity elsewhere, on D: or some place similar. You can clean out the temporary folder of TVersity by using Settings / Temporary Media Files / Delete All Files, but TVersity will do so by itself after a while, so that isn't really necessary Some sources suggest temporary files are only created when TVersity is transcoding stuff, but this seems to be wrong. I've seen it creating temporary files when simply streaming. TVersity (Pro) has a very interesting feature: it can transcode media files to another format on the fly. If your device doesn't support the provided image format (because for example your TV is too old, or something similar) TVersity will convert it into something else. There is a file profiles.xml involved which is way to complex for me, but I hope some of the items below can help you getting started. There are two basic approaches: fool around with the profiles.xml file, or do it the easy way. First the easy way, good when you only have a single device to stream to. My Philips LCD doesn't eat that many weird formats. I got it working by using the following settings in TVersity:
The setting above would affect all devices, so here's the second approach: leave TVersity on automatic, assign manual IP addresses to troublesome devices and change the file profiles.xml accordingly.
<devicesIP value="192.168.0.31"/>The profiles.xml file is pretty complex. I got my Philips TV 42PF9831 working by assigning it a permanent IP address, and adding that IP address to the profile "alwaysvideo". This effectively forced TVersity to convert anything send to my TV. Obviously, the higher the resolution, the more TVersity needs in bandwith and computing power. You can set the upper limit of TVersity's transcoding mechanism by adjusting Settings / Transcoder / Maximum Video and Image Resolution. If the file to be played has a higher resolution than the limit set here and if it needs to be transcoded it will be transcoded to the specifiied (lower) resolution. This might reduce quality, but 1. may make the file playable on your device, and 2. allows TVersity to run on machines with lower specs. The default setting is 320x240, but if you have the CPU power to spare you could try something like 640x480. Change it, play something, and check your CPU load using the Task Manager, it should stay below 100% if possible. Note that TVersity seems to run in 'blocks' when transcoding. On my test rig, running in a VM, it seemed to transcode in 'short blocks', ie. maxing a few seconds at 100%, then idling along until the next 100% peak. I'm not sure this is the normal behaviour though, or if it was simply a consequence of the way I set things up. Note: as of 3.1 it seems to limit itself to 50% CPU power. Though to be honest something else on that server might have changed :-) Hold
on. 640x480... Yeah, I know. That's not HD at all.
When to use Transcoding? Most devices that can handle streaming can handle regular file shares as well, so why use TVersity? Mostly because of transcoding. The Transcoding feature of TVersity comes in handy in the following situations:
Assuming you have an Intel Atom as a player, then you could add that player's IP address to the 'alwaysvideo' section, as I showed a little earlier. Assuming you have your files available through a share as well as through TVersity, you can now either play the file directly through that share, and if the Atom cannot handle it you can now play it through TVersity. You can set the max resolution of any file transcoded by TVersity, thus you can keep reducing the allocated bandwith and resolution until your Atom (or the server, for that matter) can handle it. If you opt to use TVersity only for such 'fallback' duty you won't have to mess around with the profiles.xml function. Just set the following options:
Custom menu The
'custom menu' option doesn't work well. Better go classic and set up a
decent folder structure.
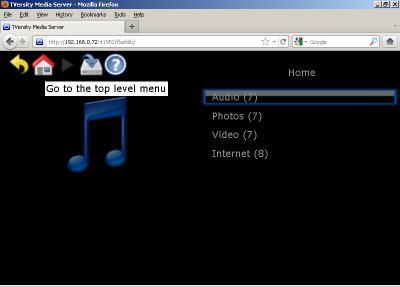
Browser based playback You can access TVersity (and thus any media it is aware of) using any regular browser in your home network. Try the following links in your browser (adjust IP settings where necessary, obviously these links won't work on your machine unless your TVersity machine is also at 192.168.0.72).
I've
noticed that TVersity sometimes misses one or more image files. If so,
you'll need to hit the Refresh Media Library button.
Internet streaming It
shoud be possible to stream internet stuff like YouTube to a device. In
theory :-) It does depend on the device it seems. For example, playback
to HTPC's worked fine, but my Philips television wouldn't swallow it. (But
it's an older beast so that could be the TV.)
iPad playback Use
the non-flash interface.
Android playback I found two ways:
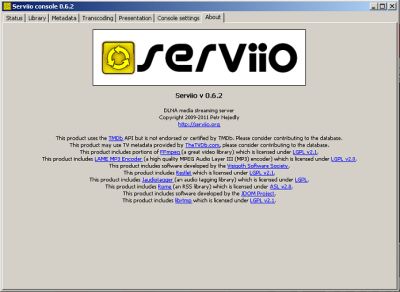
I stumbled upon Serviio when looking for a solution to stream data to an iPad. In the end I didn't use Servioo for that, but found out it's a good alternative / replacement for TVersity. Also, it's free (was free?), never a bad thing :-)
I haven't checked out all options, especially not the option of creating your own DLNA profiles. Without a doubt that's the way to Video entertainment nirvana, but with DLNA clients getting smarter and smarter I've been statisfied thus far. Installation and configuration is straightforward. If you want to limit Serviio to video only, you'll have to clear the tick boxes for 'music' and 'images' on the Library / Shared folders' tab. I don't think it is possible to change the Serviio DLNA service name after installation. If you want to change it, just reinstall the program. Servio uses TCP port 8895 and UDP port 1900. Servio does transcode. Not that I have a clue how to set it up, it probably involves the aforementioned DLNA profiles. It seems to work out of the box though. The one problem that I had with Serviio was some standby issues under Windows XP. This might have been my particular configuration though. Update. Serviio is no longer entirely free. According to the Servio page, the 'Pro' version allows web browsing, all other features essential features should still work in the free version. (I seem to recall a different license ie. exclusing of transcoding in the free version in the past, I might be wrong.) XBMC can be used as a client but it can also serve as a DLNA server, though to do so the program must be running. As I needed to run other stuff as a second user as well (see here) that doesn't bother me too much, but it might have to run twice if you plan to use the server simultaneously as a client which probably won't work :-) Still, should work fine when running on a dedicated server... Sorry. Still need to check the implications of this solution. Not sure if it transcodes. Aka SqueezeBox Server aka Logitec Media Server. SlimDevices, SqueezeServer, SqueezeBox server. Whatever the name. It's the software that is part of the SqueezeBox solution of SlimDevices / Logitech. The software is actually free, as Logitech made money on the sales of their SqueezeBox devices, such as the SqeezeBox Classic, the SqueezeBox Touch, the Duet, and so on. These little gadgets allow you to stream music to your stereo without the need for a 'real' HTPC. It's actually amazing that none of the stand-alone 'mediaplayers' offers a good display and a set of buttons on the front face, effectively putting LogiTech out of business. If prices of tablets keep going down... A cheap tablet with ethernet and SPDIF might be the ticket. Update. Logitech no longer sells SqueezeBox devices. You might want to pick one up second hand. As of now (2015) there are a few different ways to deal with your massive MP3 / FLAC collection...
A SqueezeBox needs a server somewhere in the network, either:
On the 'official' page you can find the last (official) version 7.7.6 http://www.mysqueezebox.com/download
7.9.0 The latest (unofficial) version is 7.9.0. Which seems to runs fine. This and other versions you can find here: http://downloads.slimdevices.com
Easy...
Through the SqueezeBox Sever Control Panel you can specify the folder that contains all your music but as far as I can tell, it is only possible to specify one folder. If you want to include other folders you'll have to place a shortcut to your additional files right in that source folder (I've not tested this though, to be honest). The SqueezeBox Server software needs a bunch of ports open: TCP 10000, 3483, 8000, 9000 to 9010, 9090, 9100, and UDP 3483. This is done automatically for Windows Firewall, but you may have to open them when using something else. (See note on using a specific port further down.) Like so many programs SqeezeBox Server has its own cache folder. Unfortunately it seems you cannot specify another location. The default setting is: C:\Documents and Settings\All Users\Application Data\Squeezebox\Cache
If you need to transcode (for example Flac to MP3, for downloading to a SqueezeCommander client, or stream over the internet) you need to install Lame as well.
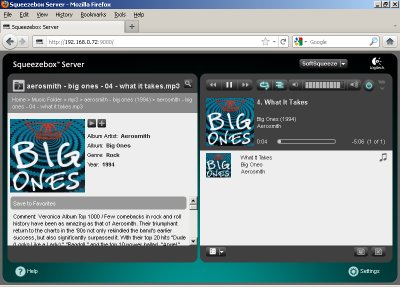
Squeezebox Server web interface You can control the SqueezeBox Server using either the SqueezeBox Server Control Panel, or using a web interface. The web interface can be called from any other PC / browser in your network. For example, my SqueezeBox Server is running on a virtual machine (see VirtualBox) with address 192.168.0.72. To start the SqueezeBox Server web interface, I enter the following in my web browser: http://192.168.0.72:9000/That will bring up the web interface. Now you can use the web interface to control whatever your SqueezeBox hard- or software player is playing.
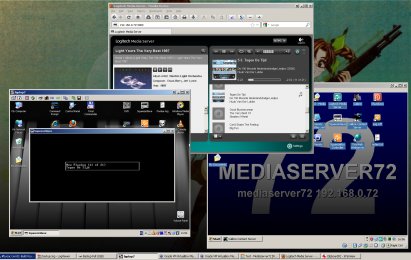
Note that the web interface may take some to to start the first time... Here's an example of actual usage: on the left there's VNC, showing me the desktop of my HTPC, which is running SqueezeSlave. It could have been a real SqueezeBox as well, but I haven't got one (yet). On the right there's a VIrtualBox VM, on which SqueezeBox server runs. Then in the middle there's a FireFox session (which could be running on any machine in the network, or another browser on a handheld device) showing the SqueezeBox aka Logitech Media Server user interface, which controls whatever is played.
That sounds like a lot of troubles, but it actually is a lot easier. The complex setup above is because I was trying to figure out how things worked, before starting to spend some serious money on it, here's another look at it: think of it as three different roles... First there's all the music stored somewhere (the server or storage), then there's the software or device that plays the music (the renderer or player) and finally there's one that controls what is played (the controller). Splitting out the three roles starts making sense when you're using a hardware playback device such as a Squeezebox, and / or have your music stored somewhere centrally (away from the living room and / or accessible for everyone on the network). One more time... Simplest: a PC with jukebox / music player software (not SqueezeBox). PC with software -> audio amplifierReal (hardware) SqueezeBox. Server (storage) <-> SqueezeBox (controller + player) -> audio amplifierWhat's played on the SqueezeBox is either controlled from the SqueezeBox itself (as above) or by a browser somehwere (anywhere) in the network as below: Browser (controller) -> Server (storage) -> SqueezeBox (player) -> audio amplifierIn my test setup, I was doing things the difficult way, running the SqueezeBox server software on a VM, and running SqueezeSlave on the HTPC. Browser (controller) -> SqueezeBox server (storage) on VM -> SqueezeSlave (player) on HTPC -> audio amplifier
Try
a SqueezeBox, that's what it's
all about. It's also what LogiTech wants you to buy :-)
Software players There
are a few software players available, SoftSqueeze,
SqueezeSlave
and SqueezePlay. I've tried all
of them and they work fine. You could also try MP3
streaming.
Security You could access SqueezeBox Server from the Internet, but I'm not so sure that's a good idea, security wise. You can protect the web interface using a username / password. Go to Settings / Advanced / Security. It seems this only protects the web interface, not actual playback. SqueezeSlave kept working. (I haven't got a real SqueezeBox device yet, so that might make sense.) You can specify a different port. The default port is 9000. I managed to change it using Settings / Advanced / Network, but it caused strange pauses during playback. Note that by default a number of ports are opened, not just 9000. I haven't been able to find easily digestible information on this, so I went back to the default port. (A different port works, I suspect some players try multiple adresses, then finally end up using whatever you've set yourself. I'm too lazy to further investigate :-)) Applications can talk to the SqueezeBox server, and control the connected clients, by communicating with port 9090. You probably never need or use anything of this, and I no longer use this myself, but hey, why throw away this information. Never can tell if it will become useful again.... When you start SqueezeSlave you can specify the mac address, which helps identifying the different clients. For simplicity, I tend to use the last block of the IP address as SqueezeSlave mac address. With SqueezeSlave on the same machine as SqueezeBox server which for example could be 192.168.0.4, it would be started with: squeezeslave.exe 192.168.0.4 -D -R -m 00:00:00:00:00:4For example, every night at 01:00 a batch file is called by the task scheduler. This batch file uses an application called 'netcat' to send a specific string to 192.168.0.4 port 9090: rem sleep.batThe file sleep.cmd contains the string send to the SqueezeBox server, in it you have to specify the mac address of the SqueezeSlave client. Here's what sleep.cmd could contain: 00:00:00:00:00:04 sleep 1Be aware that some versions of netcat are (ab)used for not-so-nice purposes, backdoors, as trojan components etcetera, thus many virus scanners might report even the benevolent versions... I haven't been able to figure out how to add a username / password to netcat. If you want to use netcat, make sure you haven't set a username / password in the SqueezeBox server... Update. ImageBank is now called PhotoStreamr. Still works the same. ImageBank allows convenient access to all images on your server, right from the iPad. Especially for those technologically challenged (spouses, unite! :-)). ImageBank required installation of Java on your server. It suggests to install 'Bonjour' but everything here worked fine without it. When running the iPad side, I just specified the IP address myself, and from there things worked right out of the box. ImageBank, unfortunately, is not an entirely 'clean' program. It won't run as a service, and when you start it a second time, it complains about a previous instance already using its designated port, and finally the server side programs for Android clients and iPad clients are different, but won't coexist. That's a pity, because I would have liked to access all images from an Android device as well. It's also written in Java, and Java has become notorious for security leaks... Another (minor) gripe is that you can't specify a password for 'Internet access only'. It would have been nice if local access (to a specified port) would not require a password, whilst access over the Internet (via a different port, forwarded from your router) would. That would add just a little more security to block unauthorized access to your images collection. At the moment you can set a password, but then local users must also always enter it, which is inconvenient... And (this may be my setup) why isn't the program always asking for a password? Weird. In spite of that, it's probably still your best option.
This program, together with its client StreamToMe on the iPad, allows easy access to all video files on your server from an iPad. Another option would be the use of a DLNA player on the iPad, but I found this solution easier. The newer versions of ServeToMe can install as a service. Unfortunately, it allows jumping through some hoops if you do NOT want to install iTunes. I think you're better served (pun unintentional) by installing AirVideoHD. Just like ServeToMe this application allows streaming video to your iPad. The big difference is that on AirVideoHD allows server side transcoding in combination with downloading for offline viewing. In other words: with this program you can copy movies from the server to your iPad, and watch them later at a convenient moment. You can set the quality level to match the smaller iPad screen. It would have been great if there would have been an Android version, or equivalent program.
Calibre doesn't exactly belong on a HTPC. However, once you start moving all your data over to a 24/7 running server, you might encounter that forgotten stack of ebooks... Well, if you're using an iPad or something similar and you want to add a couple of ebooks to your device just before leaving home, and you don't want to launch your PC, then you could consider installing Calibre. Again,
it just may not make that much sense, but that's all up to you :-) I've
just added a few notes here how to install and run Calibre on a machine,
but nothing extensive. Some things you'll have to figure out yourself.
Installation Easy...
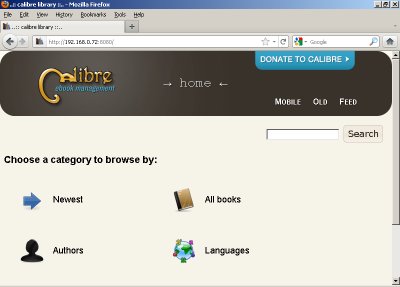
You may have to set up an exception in your firewall for the port Calibre uses. Calibre creates a copy of each ebook or other document you feed it, and stores it in its own 'database'. This leaves you two options: either use Calibre to manage all your ebooks, or only use Calibre as a reader and conversion tool and hold on to a manually maintained folder / file structure. If you use Calibre as your one stop solution, make sure you put the ..\reader_data\calibre folder somewhere where a. it can grow, and b. you won't forget to backup it. If you prefer an old fashioned folder structure and do not want to rely on Calibre for organising your files, then remember to empty the Calibre library now and again, as you might end up with countless duplicates. It's all a matter of choice and taste. Calibre can run as a simple content server. You can either run Calibre, go to Preferences / Sharing / Sharing over the Net / Start Server, or you can launch the content server from the command prompt using: C:\> program files \ calibre2 \ calibre-serverThe above will launch the Calibre content server on its default port 8080. You can specify any other port usng the --port option. To access all files / books in Calibre point your browser to: http:\\192.168.0.72:8080... and then you can download any of the ebooks known to Calibre. (The IP address 192.168.0.72 is the one my test setup uses.) Note that there is no online (browser based) module to read the ebook. You'll still need software locally (such as Calibre :-)). Using
Calibre in a media server setup is a little tricky. There is no real option
to have the database 'et al' located on your server and run muliple Calibre
clients on different PC's, grabbing books from your home server whenever
required. So you might consider simply leaving Calibre local, and perhaps
organize your ebook collection the 'old fashioned' way in a folder / file
structure.
iPad (and why to use the content server) Is
the Calibre content server of any use then? Well, actually, it is! (Though
you might run it local for the same reason.) eBook readers like Stanza
on the iPad do not take into account the actual file name. So, if you have
a complete series of books, you won't be able to figure out in what sequence
you should read them, and (on the iPad) it's a little cumbersome to transfer
them to your device. By browsing to the content server (ie. using
Safari, not using Stanza itself) on the iPad, you'll end up with a nice
list of all books, properly sorted, thus making it easier to pick and download
the right volume.
Fancy stuff Calibre wasn't entirely designed with a home server in mind. If you keep your database up to date locally, and you need to kill a remote content server, copy all to a server, then restart the content server, you're entering advanced territory. The information here (XP) and here (Windows 8) regarding remote tasks might help you a little. Specialists and advanced users only. Note that BubbleUPnP seeems to use or need port 1900, which may play havoc with, for example, Plex. You may have to pick one and drop the other. Streaming video to a ChromeCast has its limitations. The ChromeCast only supports a limited number of (video) formats. It should be possible to tell TVersity to serve the proper file format to a ChromeCast, but I ran into several issues. To simplify matters I choose to install the BubbleUPnP server application, which (together with some changes of the settings on the Android app side) fixed all the issues. If you need to configure the server side, go to: http:\\192.168.0.72:8080There are now several settings, confusingly in different places, that can affect transcoding performance:
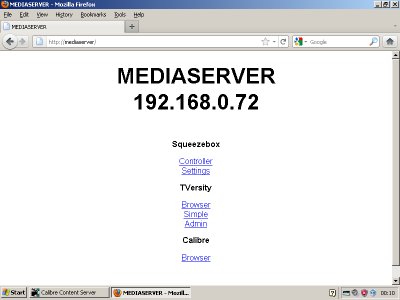
Note: TVersity encoded in bursts, and pauses in between. When using Task Manager on your server you should see the CPU maxing out for a minute or so, then dropping a bit, then processing again. If the CPU load stays continuously at 100% your settings are too high and / or your CPU is not powerful enough. I haven't been able to figure out why some non-supported formats cause little transcoding time and CPU load, whilst some supported formats run the CPU 'to-the-max'. Oh well, how large is the change that two people ain my three people household are both using their Chromecast to stream an unsupported movie from my home server... With all those different URL / IP adresses and ports, I started to lose track. To make live a little easier, I installed a very small web server on my media server. Installation is easy...
SqueezeboxThis could look something like:Controller - http://192.168.0.72:9000TVersity
Whenever you're on your home network, point your browser to: http://192.168.0.72:80Or, assuming your mediaserver is called 'mediaserver72' you could simply enter: http://mediaserver72... or even (depending on your browser): mediaserver72... thus giving you quick access to your media server web components. Yes, just type 'mediaserver72' in your browser, and voila. Instant statisfaction. Frankly, nothing is going to stop placing all your favorite links on that page, and use it as your browser's homepage :-) Windows 10 I didn't like the old cost model for Plex, but things have improved, so when I upgraded to Windows 10 I considered giving Plex a shot as well. I'm not sure if it plays nice with BubbleUPNP though.... Anyway, Plex itself installed fine and ran the first time. As for the current discussion regarding its privacy policy... you have to figure that one out yourself. If you don't trust things going on, consider blockign Plex' access to the Internet. Note that Plex adds its own rules to the Windows Firewall, so even if you block Plex, it will quietly and quickly enable access to the Internet again, no matter what you do. Plex has changed its policy, yet again, but I'm still not entirely convinced. On top of that, Plex sometimes simply didn't do what it had to do, so I removed it. Reading all the enthousiastic stories on the net it's probably very good, but nor for me :-( UMS has its roots in PMS, a dedicated DLNA server for the PS3. It got rebuild, and now serves many other things... One big disadvantage of UMS is that it's not always clear what option is where, and configuration might be a bit (lot?) more challenging than any of the other tools, and it is sometimes quite a bit slower. But hey, it's free... You'll
find the documentation here.
CPU requirements Compared with TVersity UMS needs quite a bit more processing power. (Perhaps because it is written in Java, or because it has to interact with some external libraries? I have no clue.) A recent dual core Pentium would handle multiple streams when using TVersity, but can barely handle a single stream in UMS. In fact, I had to change 'Transcoding quality' to 'Automatic (wireless)' or it would stutter. If
you need transcoding multiple streams simultaneously I would suggest as
a minimal CPU an I3 (quad core) with 4 GB of memory. Any of the new AMD
Ryzen chips would probably work just fine. Hardware encoding on the Intel
side might be a tad better, but isn't always supported.
Using the web interface The web interface can be accessed using your browser by visiting http://192.168.0.72:9001: http://192.168.0.72:9001
By default the DLNA server uses port 5001 and the web interface 9001. If you have other applications using those ports you may have to change these. Unfortunately you can set the DLNA port in the regular user interface but cannot set the web port. If you want to do so you'll have to change the file C:\Users\All Users\UMS\UMS.conf. You can also edit this file using 'General Configuration / Edit UMS configuratiion file manually'. Look for the line 'web_port =' and add a port number. For example: port =5002  
|
|
|